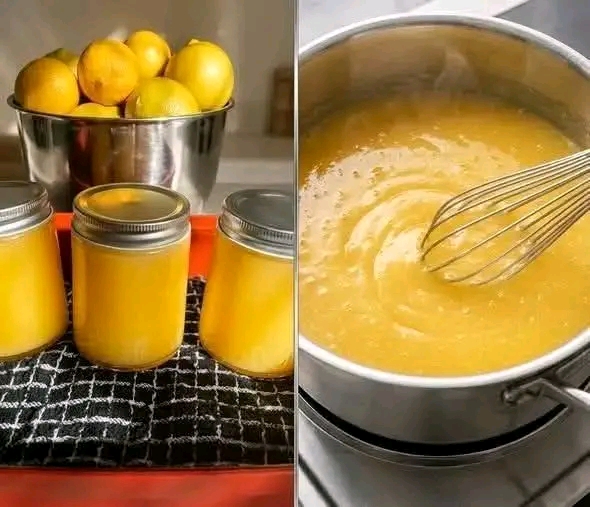
🍋 Creamy Homemade Lemon Curd — Rich, Silky & Absolutely Amazing!
Introduction
If you love bright, fresh lemon flavor, homemade Lemon Curd is a recipe you absolutely need to try! 🍋✨ It is smooth, creamy, buttery, sweet, and wonderfully tangy. As the original comment says, “This stuff tastes freakin amazing!!” — and once you make it yourself, you’ll understand why.
Lemon curd is incredibly versatile. Spread it over toast, spoon it onto pancakes, fill cakes and cupcakes, swirl it into yogurt, or simply enjoy a little by the spoonful. It transforms ordinary desserts into something special.
🛒 Ingredients
Makes about 2 cups
- 4 large egg yolks
- 2 large whole eggs
- ¾ cup granulated sugar
- ½ cup fresh lemon juice, preferably freshly squeezed
- 1 tablespoon finely grated lemon zest
- ¼ teaspoon salt
- 6 tablespoons unsalted butter, cut into small pieces
- 1 teaspoon pure vanilla extract, optional
For serving:
- Fresh berries
- Whipped cream
- Powdered sugar
- Toast, biscuits, scones, pancakes, or waffles
- Vanilla ice cream
👩🍳 Instructions
1. Prepare the lemons
Wash and dry the lemons well. Finely grate the yellow outer peel to make your lemon zest, being careful not to grate too deeply into the white pith because it can taste bitter.
Juice the lemons and strain out seeds and pulp if necessary.
2. Mix the eggs and sugar
In a medium saucepan, whisk together the egg yolks, whole eggs, and sugar until smooth and slightly lighter in color.
Add the lemon juice, lemon zest, and salt. Whisk everything together.
3. Cook the curd slowly
Place the saucepan over low to medium-low heat.
Cook while stirring constantly with a silicone spatula or whisk. Scrape the bottom and corners of the pan frequently.
The mixture will gradually become thicker and creamier. This usually takes around 8–12 minutes.
Do not let the mixture boil. Gentle cooking helps create that beautiful silky texture.
4. Check the consistency
The lemon curd is ready when it coats the back of a spoon and leaves a clear line when you run your finger through it.
For a more precise check, it should reach approximately 170–175°F (77–79°C).
5. Add the butter
Remove the saucepan from the heat.
Add the butter pieces one at a time, whisking until each piece melts completely before adding the next.
Add vanilla extract if desired.
6. Strain for extra smoothness
For an exceptionally silky lemon curd, pour it through a fine-mesh strainer into a clean bowl or container.
This removes any tiny pieces of cooked egg and creates an ultra-smooth finish.
7. Cool
Place plastic wrap directly against the surface of the curd to prevent a skin from forming.
Allow it to cool, then refrigerate.
The curd will become noticeably thicker as it chills.
🍋 The Best Method for Perfect Lemon Curd
The secret is gentle heat and constant stirring.
Eggs provide the structure, while sugar balances the acidity. Fresh lemon juice gives the curd its bright citrus flavor, and butter creates the luxurious, creamy texture.
Avoid high heat because the eggs can scramble. If you notice the mixture becoming too hot or thickening too quickly, immediately remove the saucepan from the heat and continue stirring.
📜 A Little History
Lemon curd has long been associated with British baking and afternoon tea traditions. Early versions were generally made by cooking lemon juice with sugar and eggs to create a tart, spreadable preparation.
Over time, butter became an important ingredient, giving modern lemon curd its characteristic richness and smooth texture.
Today, lemon curd is enjoyed far beyond Britain and has become a favorite filling for cakes, tarts, pastries, cookies, and breakfast treats.
🎂 Formation & Texture
A beautiful lemon curd should have:
- A smooth, glossy appearance
- A rich yellow color
- A creamy, spoonable consistency
- A strong but pleasant lemon aroma
- A balance of sweet, tart, and buttery flavors
When refrigerated, it should become thick enough to spread but remain soft and creamy.
❤️ For Lemon-Lover Desserts
If you’re a true lemon lover, try using this curd in:
🍰 Lemon Layer Cake
Spread lemon curd between vanilla or lemon cake layers, then cover with buttercream or whipped cream.
🥧 Lemon Tart
Pour the finished curd into a baked tart shell and chill until beautifully set.
🧁 Cupcake Filling
Make a small hole in the center of vanilla cupcakes and fill them with lemon curd.
🥞 Pancakes & Waffles
Warm pancakes topped with lemon curd, berries, and whipped cream make an incredible breakfast.
🍓 Berry Parfait
Layer Greek yogurt, lemon curd, strawberries, blueberries, and crunchy granola.
🍦 Ice Cream
Spoon chilled lemon curd over vanilla ice cream for an easy dessert.
🔥 Pro Tips for the Best Results
Use fresh lemons: Freshly squeezed juice gives the brightest flavor.
Don’t skip the zest: Lemon zest contains fragrant oils that intensify the citrus flavor.
Cook gently: High heat is the biggest enemy of smooth lemon curd.
Keep stirring: Constant movement helps prevent the eggs from cooking unevenly.
Strain it: This extra step makes the finished curd exceptionally smooth.
Chill before judging the thickness: Lemon curd becomes considerably thicker when cold.
🧊 Storage
Transfer the finished lemon curd to a clean, airtight container and refrigerate promptly.
For the best quality, use it within about 1–2 weeks. Always use clean utensils when serving, and discard it if it develops an unusual smell, appearance, or mold.
🌟 Conclusion
Homemade lemon curd is one of those simple recipes that feels much more luxurious than the ingredients suggest. A few eggs, fresh lemons, sugar, and butter come together to create something wonderfully creamy, glossy, sweet, and tangy.
Whether you spread it on warm toast, spoon it over pancakes, fill a beautiful cake, or simply sneak a taste straight from the refrigerator, this homemade lemon curd is guaranteed to make lemon lovers smile. 🍋💛
If you made this recipe, a little “YUM!” in the comments is definitely deserved! 😋🍋