
Introduction
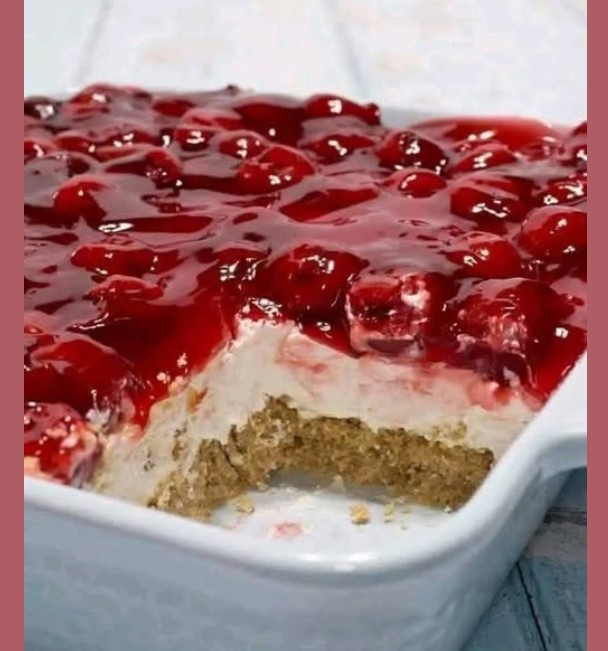
No-bake cherry cheesecake is a timeless dessert that combines simplicity with indulgent flavor. With its buttery graham cracker crust, smooth and creamy cheesecake filling, and vibrant cherry topping, this dessert is both visually appealing and deeply satisfying. Unlike baked cheesecakes, this version requires no oven time, making it ideal for warm weather, busy schedules, or anyone seeking a foolproof dessert that delivers consistent results.
The texture is light yet rich, the flavors are well balanced, and the preparation process is straightforward. This recipe produces a cheesecake that sets beautifully, slices cleanly, and melts in the mouth with every bite.
Ingredients
For the Graham Cracker Crust
- 2 cups graham cracker crumbs
- ½ cup unsalted butter, melted
- ¼ cup granulated sugar
- ¼ teaspoon salt
For the Cheesecake Filling
- 16 ounces cream cheese, softened to room temperature
- 1 cup powdered sugar
- 1 teaspoon vanilla extract
- 1½ cups heavy whipping cream, cold
- 2 tablespoons lemon juice (optional, for balance)
- Pinch of salt
For the Cherry Topping
- 1 can (21 ounces) cherry pie filling
or - 2½ cups fresh or frozen cherries
- ½ cup granulated sugar
- 1 tablespoon cornstarch
- 2 tablespoons water
- 1 teaspoon lemon juice
- ½ teaspoon vanilla extract
Equipment Needed
- 9 x 9-inch baking dish or springform pan
- Mixing bowls
- Electric mixer or hand whisk
- Rubber spatula
- Measuring cups and spoons
- Saucepan (if making homemade cherry topping)
Step-by-Step Instructions
Step 1: Prepare the Graham Cracker Crust
- In a medium bowl, combine graham cracker crumbs, sugar, salt, and melted butter.
- Stir until the mixture resembles wet sand and holds together when pressed.
- Transfer the mixture into a 9 x 9-inch baking dish.
- Press firmly and evenly into the bottom using the back of a spoon or the bottom of a glass.
- Place the crust in the refrigerator for at least 30 minutes to firm up.
This chilling step is essential to ensure the crust stays intact when slicing.
Step 2: Make the Cheesecake Filling
- In a large mixing bowl, add softened cream cheese.
- Beat on medium speed until completely smooth and free of lumps.
- Add powdered sugar gradually, mixing until fully incorporated.
- Mix in vanilla extract, lemon juice (if using), and salt.
- In a separate chilled bowl, whip the heavy cream until stiff peaks form.
- Gently fold the whipped cream into the cream cheese mixture using a spatula.
- Fold carefully to maintain airiness while ensuring the mixture is uniform.
The result should be thick, creamy, and light, with no visible streaks.
Step 3: Assemble the Cheesecake
- Remove the chilled crust from the refrigerator.
- Spread the cheesecake filling evenly over the crust.
- Smooth the top using an offset spatula or spoon.
- Cover loosely and refrigerate for at least 4 hours, preferably overnight.
This chilling time allows the filling to fully set and develop structure.
Step 4: Prepare the Cherry Topping (Optional Homemade Version)
If using canned cherry pie filling, skip to Step 5.
- In a saucepan over medium heat, combine cherries and sugar.
- Cook for 5 to 7 minutes until the cherries release their juices.
- In a small bowl, mix cornstarch with water to create a slurry.
- Pour the slurry into the cherry mixture, stirring constantly.
- Continue cooking until thickened and glossy.
- Remove from heat and stir in lemon juice and vanilla extract.
- Allow the topping to cool completely before using.
Cooling is crucial to prevent melting the cheesecake layer.
Step 5: Add the Cherry Topping
- Once the cheesecake is fully set, gently spoon the cherry topping over the surface.
- Spread evenly to the edges.
- Return the cheesecake to the refrigerator for an additional 30 minutes.
This final chill helps the layers bond and improves slicing.
Serving Instructions
- Slice using a sharp knife wiped clean between cuts.
- Serve chilled for the best texture and flavor.
- Optional garnish includes whipped cream or shaved chocolate.
Storage and Shelf Life
Refrigerator
- Store covered in the refrigerator for up to 4 days.
Freezer
- Freeze without topping for up to 2 months.
- Thaw overnight in the refrigerator before adding cherry topping.
Variations
Crust Variations
- Vanilla wafer crumbs
- Digestive biscuits
- Oreo crumbs without filling
Flavor Variations
- Strawberry topping
- Blueberry topping
- Raspberry compote
- Lemon curd
Chocolate Version
- Add ½ cup melted chocolate to the cheesecake filling.
- Use chocolate cookie crust.
Troubleshooting Tips
- If the filling is too soft, it likely needs more chilling time.
- Always use full-fat cream cheese for proper structure.
- Do not overmix whipped cream or it may deflate.
- Ensure toppings are fully cooled before adding.
Texture and Flavor Notes
This cheesecake offers a creamy, mousse-like interior with a crisp yet tender crust. The cherry topping provides a tart contrast to the rich filling, creating a balanced dessert that is neither too sweet nor too heavy. Each layer complements the next, delivering a harmonious bite from start to finish.
Conclusion
This no-bake cherry cheesecake is a classic dessert that never goes out of style. With minimal effort and no oven required, it delivers professional-quality results every time. Whether served at family gatherings, holidays, or casual dinners, it remains a crowd favorite due to its elegance, flavor, and simplicity.