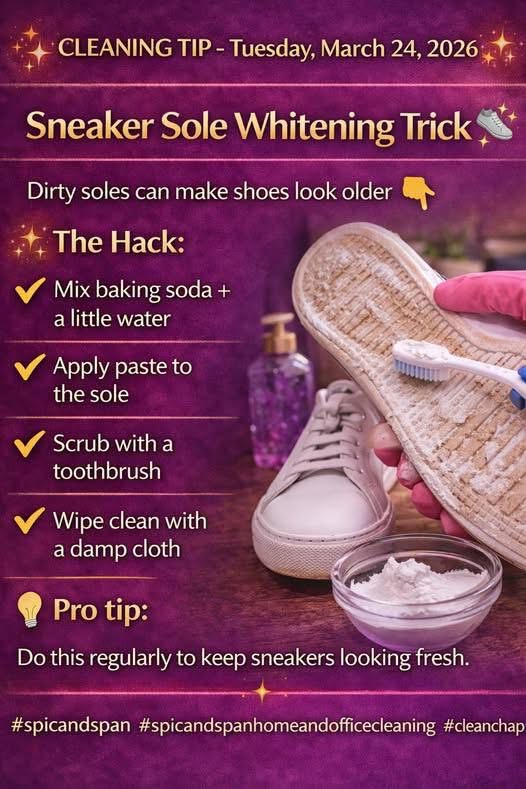
CLEANING TIP – Sneaker Sole Whitening Trick 
Complete Step-by-Step Method Guide
Keeping your sneakers clean is not just about style—it also helps extend the life of your shoes. One of the most common problems people face is dirty, yellow, or stained soles. Even if the upper part of your sneakers looks clean, dirty soles can make your entire shoe look old and worn out.
The good news is that you don’t need expensive products to fix this. With simple household ingredients like baking soda and water, you can restore your sneaker soles and make them look almost new again.
This guide will walk you through a complete, detailed method to clean and whiten your sneaker soles effectively.
 Why Sneaker Soles Get Dirty and Yellow
Before starting, it’s important to understand the causes:
- Dirt and dust buildup
- Walking on rough or muddy surfaces
- Oxidation (reaction with air over time)
- Stains from oils and chemicals
- Improper cleaning habits
White rubber soles are especially prone to turning yellow if not cleaned regularly.
 Materials You Will Need
To perform this cleaning method, gather the following items:
- 2 tablespoons baking soda
- Small amount of water
- Old toothbrush (or soft brush)
- Clean cloth or microfiber towel
- Small bowl
- Optional: white vinegar (for stronger cleaning)
- Optional: dish soap
 Step 1: Prepare the Cleaning Paste
The first and most important step is creating the cleaning mixture.
Method:
- Take a small bowl
- Add 2 tablespoons of baking soda
- Slowly add water (little by little)
- Mix until you get a thick paste
 The paste should not be too watery—it must stick to the sole.
Why it works:
- Baking soda is a mild abrasive
- It removes dirt without damaging rubber
 Step 2: Prepare the Sneakers
Before applying the paste:
- Remove loose dirt using a dry cloth or brush
- If the soles are very muddy, rinse lightly and let dry
- Make sure the surface is not too wet
This helps the paste work better.
 Step 3: Apply the Paste
Method:
- Dip your toothbrush into the paste
- Apply it directly onto the dirty sole
- Spread evenly across all stained areas
Focus on:
- Edges
- Grooves
- Heavily stained spots
 Step 4: Scrub the Soles
This step is where the cleaning happens.
Method:
- Use a toothbrush to scrub in circular motions
- Apply gentle to medium pressure
- Continue for 3–5 minutes
For tough stains:
- Scrub a bit longer
- Reapply paste if needed
Tip:
Don’t scrub too hard to avoid damaging the rubber.
 Step 5: Let It Sit
After scrubbing:
- Leave the paste on the sole for 5–10 minutes
This allows the baking soda to break down stains deeply.
 Step 6: Wipe Clean
Method:
- Take a damp cloth
- Wipe off the paste completely
- Remove all residue
Make sure no white powder remains.
 Step 7: Dry Properly
- Let the shoes air dry
- Avoid direct sunlight for long periods
This prevents yellowing and damage.
 Deep Cleaning (For Very Dirty Soles)
If your soles are extremely dirty or yellow:
Stronger Method:
- Mix baking soda + vinegar + a drop of dish soap
- Apply the paste
- Scrub and leave for 10 minutes
This gives stronger whitening results.
 Common Mistakes to Avoid
 Using too much water (paste becomes weak) Scrubbing too hard Not cleaning regularly Leaving residue on the sole Drying in extreme heat
 Pro Tips for Best Results
 Clean your sneakers once a week Use a soft brush for better control Always test on a small area first Store shoes in a clean, dry place Use protective spray to prevent stains
 Time Required
- Preparation: 5 minutes
- Cleaning: 10 minutes
- Drying: 20–30 minutes
Total: ~30–45 minutes
 Benefits of This Method
- Makes soles look new again
- Removes stains and dirt
- Low cost (uses household items)
- Safe for most rubber soles
- Easy and quick
When to Clean Your Sneakers
You should clean your soles when:
- They start looking yellow
- Dirt becomes visible
- After walking in muddy areas
- Before storing shoes
 Maintenance Routine
To keep your sneakers fresh:
- Wipe soles after each use
- Deep clean once a week
- Avoid walking in dirty areas when possible
 Alternative Natural Cleaners
If you don’t have baking soda:
- Toothpaste (non-gel)
- Lemon + salt
- Dish soap + warm water
Final Conclusion
Cleaning sneaker soles is simple but makes a big difference in appearance. With just baking soda and a few minutes of effort, you can restore your shoes and keep them looking fresh and stylish.
Regular cleaning not only improves appearance but also extends the life of your sneakers. By following this method consistently, your shoes will always look clean, bright, and well-maintained.